Sunday, October 10, 2010

Country Fair Findings

I give you a few pictures from a great country fair that took place this past weekend in Connecticut. Enjoy!

4-H club kids showing off their calves.

The lucky winner!

Cute little piglets, (not for eating!)

Perfect vegetable contests.

Blue ribbon brussel sprouts.

A tough judge inspects an entry for apple pies.

Some bunnies...

...and chickens, (again not for eating).

Beautiful nature artwork for your home or office.

And finally... a grilled white pizza. It sounded like a good idea but was actually quite inedible. Hmmm, maybe I should have stuck to the blue ribbon veggies!

Tuesday, October 5, 2010

Mushroom Foraging


While walking after a recent rainstorm I spotted a peculiar object on the side of the road- a crazy looking mushroom... a giant puffball! And by giant I mean the size of my head. So intrigued was I with this object that I took a picture of it.

Imagine my surprise when later that day, I came across a New York Times article titled, "Fungus on the Lawn? Let's Eat!" The article encouraged readers to gather the mushrooms growing naturally on their property, and transform them into tasty dishes. Says author Ava Chin, "When I discovered a little softball-size beauty with a pure-white center last week at the College of Staten Island, I turned it into a stir-fry in garlic sauce. Once peeled, edible puffballs resemble buffalo mozzarella, and are rather pleasant."

As the locavore movement steadily grows, people have expressed interest in homesteading: caring for honeybees, gardening... cheesemaking. And while there is a certain type of panache to eating the gifts from the earth that sprout on your own property, frankly, mushrooms can be poisonous. A simple research of mushrooms reveals that while many are edible, there are just as many similar-looking ones that are deadly to eat.

So what's the lesson? Mushrooms are fun to find and look at. They are amusing. But try taking a Mushroom Foraging class before throwing lawn fungus into your soup.

Saturday, September 18, 2010

'Round that Time Again


Step outside and take a sniff. No, take a deep wholesome inhale. And what do you smell? Cool, but not frigid air. The scent of red-tinged leaves on the verge of falling from their branches. You smell apples, even though there is not an apple orchard in sight. Autumn is on it's way.

And it is simply inevitable that Autumnal foods: pumpkin, acorn squash, apples, cinnamon and yes, candy, are craved by all. And though it may still be warm enough to take a quick dip in the pool, we start taking all of the fall-y food in stride.

I have posted these Carrot Oatmeal Cookies, courtesy of 101 Cookbooks, before. But as they are delicious, healthy and vegan, I am constantly trying to tweak the recipe to produce the best possible result. They are rich in spices, like ginger, nutmeg and cinnamon, and though they do not have a single apple-related ingredient in them, they scream "Fall!" due to their orange hue and cozy maple flavor.

So behold: The Pumped-Up Carrot Oatmeal Cookie
(adapted from 101cookbooks.com)
1 cup all purpose flour

1 teaspoon baking powder

1/2 teaspoon sea salt

1 cup rolled oats

2/3 cups chopped hazelnuts

1 cup shredded carrots

1/2 cup maple syrup

2 tablespoons honey

1/2 cup canola oil

1 teaspoon ground ginger

1/4 teaspoon freshly grated nutmeg

1/4 teaspoon cinnamon

Directions
Preheat the oven to 375 degrees. 
Mix together the flour, baking powder, salt, oats, carrots and hazelnuts. Make a well in the center of the mixture and pour in the oil, maple syrup, honey and spices. Mix until combined.
Using a cookie scoop, place cookies on a parchment-lined baking sheet about an inch or two apart.
Bake on the top rack for 10-12 minutes, watching closely to make sure the bottoms aren't burned.

Friday, September 3, 2010

Food for Thought...


Thanks to everyone who participated in the giveaway, and congratulations to the winner who will receive lovely non-stick pans from the CSN website!

I currently write a column on how to travel when you are vegetarian on the fantastic travel blog, Farewell Travels. Check out my most recent article, Tour Companies Step Up to the Plate, to see how to travel effortlessly and still eat well! 

Photograph of Chinese Dumplings from Wendy Wu Tours

Wednesday, August 18, 2010

Giveaway Time!


So the folks at CSN stores happened to contact me to offer a $40 giveaway! The website offers everything from dutch ovens to wine decanters to patio furniture. So how to get this gift?

Simply take a look at the websites www.Cookware.com, www.allmodern.com, or www.csnstores.com, and make a comment below on what you would buy with the $40 gift certificate. 

Happy shopping!


Monday, August 16, 2010

Candy Land Cake!


Once again, I have been commissioned to create a cake for a 4-year olds birthday party. The theme? Candy Land!

I wanted to go above and beyond with this cake, so I bought fondant to make a smooth canvas over the chocolate and vanilla flavored cake.

I melted chocolate chips for the Chocolate Swamp, and used Peppermints to create a sort of castle. And of course, it wouldn't be a Candy Land cake without a Gum Drop Mountain Pass!

Without a doubt, every kid at the party left dreaming of a sweet, wonderful world where sugary surprises wait at every corner. At the very least, I hope they left with an uncomfortable, but oh so glorious sugar coma!

Tuesday, July 20, 2010

"Best" Chocolate Chip Cookies

Anyone who has ever made chocolate chip cookies claims to have the best recipe. Some people swear by their Great Aunt's secret family concoction that has been passed down for generations, while others will always follow the recipe on the back of the Toll House package. Finally, some home-cooks will search for hours on allrecipes.com, scanning the web for the most promising cookie photograph.

But when it comes down to it, the "best" chocolate chip cookies come from the pros. Baking aficionado Jacques Torres to be specific, via the Martha Stewart website if we want to get technical.

The recipe below yields crunchy, chunky chocolate chip cookies that are not overly sweet. I sprinkled large-grain sanding sugar on the raw dough before popping them into the oven because I was feeling snazzy.

Jacques Torres Chocolate Chip Cookies
From the Martha Stewart Website

1 pound unsalted butter

1 3/4 cups granulated sugar

2 1/4 cups packed light-brown sugar

4 large eggs

3 cups plus 2 tablespoons pastry flour

3 cups bread flour

1 tablespoon salt

2 teaspoons baking powder

2 teaspoons baking soda

1 tablespoon pure vanilla extract

2 pounds Jacques Torres House (60 percent cocoa) Chocolate or other best-quality semisweet or bittersweet chocolate, coarsely chopped

Directions
Preheat oven to 350 degrees. Line baking sheets with parchment paper or nonstick baking mats; set aside.
In the bowl of an electric mixer fitted with the paddle attachment, cream together butter and sugars. Add eggs, one at a time, mixing well after each addition. Reduce speed to low and add both flours, baking powder, baking soda, vanilla, and chocolate; mix until well combined.

Using a 4-ounce scoop for larger cookies or a 1-ounce scoop for smaller cookies, scoop cookie dough onto prepared baking sheets, about 2 inches apart. Bake until lightly browned, but still soft, about 20 minutes for larger cookies and about 15 minutes for smaller cookies. Cool slightly on baking sheets before transferring to a wire rack to cool completely.

Saturday, July 3, 2010

Perfect Brownies

Sometimes it seems as though all the good food comes from Europe. France has its beignets, eclairs and crepes, Italy has its tiramisu and gelato, Belgium has its chocolate and waffles. 

And America has what? Fast food burgers and delivery pizza? 

With America's birthday a day away, it is fitting that our country should get more credit for its culinary contributions. Take the brownie for example. This tasty confection originally appeared at the 1893 Columbian Exposition in Chicago, and since then the recipe has been reproduced thousands, (shall I say millions?) of times since, both domestically and abroad. 

This recipe, found on the fantastic blog, Smitten Kitchen, creates fudge-like, dense and delectable brownies, laden with chopped walnuts. While some people are fond of cake-like brownies, I say, if you are going to have a brownie, have a brownie. 

So try Perfect Brownies for a stellar ending to a July 4th barbecue. Serve with strawberries and blueberries if you are feeling patriotic. But frankly, there is nothing more American than a brownie. 

Perfect Brownies
From Smitten Kitchen

10 tablespoons butter

1 1/4 cups sugar

3/4 + 2 tablespoons unsweetened cocoa powder

1/4 teaspoon salt

1/2 teaspoon vanilla extract

2 large eggs, cold

1/2 cup all-purpose flour

2/3 cups walnuts, chopped

Directions
Preheat oven to 325 degrees. Line a brownie pan with parchment paper
Combine the cocoa, sugar, butter and salt into a medium sized bowl. Using a double-boiler, melt the ingredients together, stirring constantly. 
Remove from heat. Stir in vanilla extract and eggs, beating after each one. 
Stir in flour. 
Stir in walnut pieces. 
Pour the mixture into the brownie pan and bake for around 25 minutes, until a toothpick inserted into the middle comes out clean. 

Tuesday, June 22, 2010

Salmorejo (Rustic Gazpacho)

In Spanish, the word "Salmorejo" translates to "salmon colored broth." A perfect description for the pink-tinged, chilled gazpacho popularized by Spain.

Gazpacho comes in many varieties. From the chunky, veggie-filled type to the smooth, velvety liquid, to the unconventional fruit filled kind, it is the ideal food to have when the weather turns hot and sticky, and eating is the last thing you want to do. 

As you can see from my last post on sangria, I am on a little Spanish cuisine kick. I think I am drawn to Spanish food because it exhibits a relaxed, casual sort of cooking that is lacking in modern American cuisine. Look at Bravo's television show, "Top Chef" for example. While we can all relish in the beauty of contestant plating perfection, the intricacies in which sauces are created, and the delicacy in which garnishes are manipulated, the truth of the matter is that the food is fussy and unrealistic. 

But in Spain- the gloriously sun-drenched Spain- food is clear and clean, simple and beautifully delicious. The whole premise behind tapas, small plates that are meant to be shared, is to have a snack while you drink. A whole meal based on snacking and drinking? Count me in. And what is that you say? A siesta the next day? I'm in heaven. 
Add "Salmorejo" and I've reached Nirvana. 

Salmorejo 
Recipe adapted from The Barcelona Cookbook, by Sasa Mahr-Batuz and Andy Pforzheimer
(I have reduced the recipe to serve 2 people instead of 4-6 people, and have altered it slightly)

1 red bell pepper, diced

4 medium-sized, ripe tomatoes, diced

2 slices of Portuguese bread, toasted and cubed

1/2 red onion, chopped

2 cloves garlic, minced

2 cups tomato juice

kosher salt to taste

1/2 cup sherry vinegar

1/4 cup extra-virgin olive oil, more to drizzle

2 teaspoons paprika

More grilled bread, halved cherry tomatoes and black pepper for garnish

Directions
Run the tomatoes, red peppers, onion, garlic, bread and tomato juice through a food processor until it is almost-liquid. The mixture should still be a little chunky. Pour into a container.
Mix in the sherry vinegar and olive oil. Add salt to taste.
Refrigerate the container for at least 2 hours.

Serve chilled and garnish with the grilled bread, halved cherry tomatoes and black pepper.
You can pour it into a small glass like I've done in the picture for a chic little starter.

Wednesday, May 19, 2010

Sangria

When people think of a barbecue, they think of grilled chicken, hot dogs, burgers, potato salad... maybe a bag of chips thrown in as well. Simplicity is key because the food must be potable and light on the wallet. But when I think of a barbecue, I think of sangria. 

I first fell in love with sangria when I travelled to Spain to visit my sister one spring break. Though I was far too young to drink in the States yet, I took full advantage of the lenient drinking policies in Europe by ordering sangria with every meal besides breakfast. 

In college I perfected the recipe by keeping the ingredients and technique simple, and letting time do its work. Lots of recipes call for sugar, but I think the fruit itself adds enough sweetness. 

Drinking sangria is synonymous with summer, and eating wine-soaked fruit is refreshingly delicious. 

Easy Sangria
2 bottles of red wine, good quality but under ten dollars

2 apples, sliced into tiny chunks

2 oranges, sliced thin

1 lemon, sliced thin

5 shots of triple sec

1/4 cup seltzer water

1 tablespoon cinnamon

Directions
This is as easy as it gets. Dump all of the ingredients above into a pot. Cover. Let sit at least three hours. 
Add ladle and fancy glasses. Sit in sun and sip. 

Saturday, April 17, 2010

A Little Summer Poetry


Here is a little poem I wrote about my favorite summer foods. Think of it as inspiration if you will. 

Just Add Water
The birth of Heirloom Tomato,
Nestled in its milk-carton box,
Calls out to drooling mouths.

Seedlings lead me on
Though planted mere moments ago.
Water them please, more Water.

And though this morning is beautiful,
Blossoms bursting from all boughs,
I think of the day
when Heirloom Tomato grows.

Thursday, March 25, 2010

Broccoli and Asparagus Pasta Salad


After finding a box of whole-wheat penne that had been living in the depths of my pantry for over a year, I thought that it was about time to make a fine pasta salad. It is a shame that I don't make pasta salads more often because they are literally the perfect dish. Anything can be thrown in, and it takes almost no effort or technique. I had just returned from my local Co-Op the day before with a bunch of spring asparagus and a large of head of broccoli, so I knew that they were going in. I had also bought a small chunk of spicy, deep Argentine Parmesan, which added a nutty smokiness when grated over the top of the salad. Finely chopped olives mixed with dried herbs and olive oil made a salty sort of dressing that made the entire dish wonderfully satiating for lunch. I bet this would be even more fantastic with toasted pine nuts or chopped walnuts.

But while this recipe is a good starting place, I advise to make up your own recipe, dictated by the ingredients you already have on hand.

Broccoli and Asparagus Pasta Salad

1 box whole wheat penne pasta

1 head broccoli

10 asparagus spears, cut into 1/2 inch pieces

2 tablespoons olive oil

1 handful spinach

1/2 yellow onion, finely chopped

1 teaspoon each of dried basil, oregano and thyme

1/2 teaspoon of red pepper flakes

1/2 can pitted black olives, chopped finely

3 splashes of balsamic vinegar

grated Parmesan cheese

salt and pepper to taste

Directions
In a large pot, bring 4 quarts of water to a boil. Salt liberally. Add the pasta and cook, stirring occasionally for 12 minutes. Drain and rinse with cold water. Set aside.
In a large frying pan, heat a tablespoon of olive oil. Add broccoli florets and cook on medium until they are browned but not burnt. Add salt, pepper and red pepper flakes. Set aside in a separate bowl.
In the same pan, heat a tablespoon of oil on medium. Add onions and cook until transparent. Add asparagus and herbs. Add splashes of balsamic vinegar and cook until tender. If the vegetables seem like they are sticking add a little water to the pan.
Finally, combine the pasta and cooked vegetables in a large bowl. Stir in chopped olives and the handful of spinach.
Grate cheese over the top. Either serve hot immediately, or cover with plastic wrap and refrigerate.

Wednesday, March 17, 2010

Bread: Finally Achieved!


Ahh bread. The oldest, most basic form of human nourishment. I have always wondered how so few ingredients: flour, salt, yeast and water, can be so delicious and addicting.

After attempting to bake bread twice before, (and extremely disappointed with the results), I am happy to present the ideal bread recipe. No-knead technique, thick crust, soft insides and a large crumb contribute to a delicious, hardy bread. The recipe below is from Jim Lahey's My Bread: The Revolutionary No-Work, No-Knead Method. The fermenting period of the dough takes around 12-18 hours, so make sure to plan ahead! I assure you, the results will be worth it.

Basic No-Knead Bread Recipe

3 cups bread flour

1 1/4 teaspoons salt

1/4 teaspoon instant dry yeast

1 1/3 cups cool water

Cornmeal for dusting

Directions
Combine flour, salt and yeast in a medium sized bowl. Slowly pour in the water, mixing until the dough is wet and sticky. Cover with a plate or cloth. Place the bowl out of direct sunlight, at room temperature for 12-18 hours.
When the dough has bubbles on it's surface, peel the dough out of the bowl onto a floured surface. Form the dough into a ball and cover with a clean dish cloth. Let set for 1-2 hours, until the dough has risen.
Preheat the oven to 475 degrees. Place an oven-safe pot into the center of a rack to heat.* (check note)
Use pot holders to remove the pot from the oven. Slip the dough into the pot, dust with cornmeal, and cover.
Bake for 30 minutes.
Remove cover, and continue baking until the bread is a deep brown color, but not burnt, around 15-30 minutes more.
Use a spatula to lift the bread out of the pot, and let cool for at least an hour until slicing.

*Due to lack of an oven-safe pot, I used a pizza stone sitting on top of a metal dish of water.

Tuesday, March 16, 2010

Thin Crust Pizza


There is an endless war raging. Not between two countries but between two cities. New York and Chicago. Thick pizza crusts or thin. Now deep-dish pizzas are wonderful. The chewiness of the crust works when the toppings are piled high, and given the high walls of the crust; there is no worry that the cheesy toppings will slip off onto your unsuspecting pants.

That said, there simply is no comparison to a crispy, crunchy, almost burnt pizza crust that barely supports the light-handed amount of toppings. Indeed, crust is what makes the pizza. And with pizza dough so easy to make, there is no excuse for buying pre-made, chemical-laden dough, or worse, (cover your eyes!), a frozen pizza.

When you labor over your own pizza- observing the dough rise, stretching it onto a pan, shredding your own cheese, chopping your own vegetables- it is miraculously better than any pizza ever made in the history of pizzas. The labor of love is real, and you can sense it in your taste buds.

Pizza Dough (makes two crusts)
From Jim Lahey's My Bread: The Revolutionary No-Work, No-Knead Method

3 ¾ cups bread flour, (all-purpose works too)

2 ½ teaspoon yeast

¾ teaspoon salt

¾ + a pinch teaspoon sugar

1 1/3 cups room temperature water

Extra virgin olive oil for the pan

Directions
Sift the flour, yeast, salt and sugar together. Add the water and mix with hands or a spatula, until combined. The dough will be slightly stiff. Place in a bowl and cover with a cloth for 2 hours.

After it has risen, gently pull the dough onto a floured surface and divide into two balls. Cover one of the dough balls with a damp cloth for 30 minutes, and put the other ball into an oiled freezer bag to use another time.

After 30 minutes, oil a baking sheet with olive oil very well. Stretch dough onto the sheet to the edges.


Pizza Sauce (for 1 dough)

1 can no-salt added diced tomatoes

2 garlic cloves, crushed and minced

1 teaspoon oregano

1 teaspoon thyme

few dashes of red pepper flakes

Directions
Combine all of the ingredients in a food processor or a blender. Smear all over the dough with a spatula.

Suggested Toppings
The sky is really the limit when making your own pizza, but here are some interesting ideas to get you started:

-For the pizza in the photograph, I shaved a good Swiss cheese, sliced half a yellow onion, and sprinkled chopped zucchini.

-Margarita Pizza: Buffalo mozzarella, fresh basil, sliced tomatoes.

-Green Pizza: Pesto sauce, artichoke hearts, Parmesan shavings.

To Bake:
Preheat the oven to 500 degrees, and slide the baking sheet with the dough and toppings in. Check after 15 minutes. It is ready when the edges begin to darken, and the center has cooked through.

Sunday, March 7, 2010

Homemade Kombucha= Fail


I mentioned several weeks ago that I was attempting to brew my own kombucha. But after viewing the unsightly SKOBY forming on the top of the tea, I realize that something has gone quite wrong. A healthy SKOBY has a smooth rubbery finish, and an even tan coloring. But the monster growing in my room has obviously been contaminated.

So this time my kombucha failed, but I will undoubtedly try again in the future. If anyone has any tips as to why my attempt went wrong please let me know!

Saturday, February 27, 2010

Super Easy Tomato Soup


Picture this: You return home from a long day, and boy, are you exhausted! You enter your house from the cold, snowy outdoors, and your hands immediately begin to thaw from the freezing air. Tired and hungry, there is only one true solution: hot, steamy, tomato soup!

In a perfect world, we would all have bountiful gardens, holding plump tomatoes and lively bright green herbs merely feet away from our kitchens. However, we are all busy, and in the dead of winter the tomato crop does not fare too well. Canned tomatoes are the next best thing to fresh. They are packaged at the peak of their ripeness, and if you choose a type that has no added salt, you have control over the levels of sodium in your soup.

This robust soup takes around 30 minutes from start to finish, and is superb when topped with a liberal dosage of goat cheese, shaved parmesan and a few strong dashes of black pepper.

Super Easy Tomato Soup

4 15 oz cans of diced, no-salt added tomatoes

1/2 cup water

1/2 large yellow onion, diced

3 garlic cloves, minced

2 teaspoons dried oregano

2 teaspoons dried basil

1 dash cayenne pepper

pinch of sea salt

3 tablespoons almond milk (or regular milk)

2 tablespoons olive oil

big splash of balsamic vinegar

goat cheese and/or shaved parmesan (optional)

Directions
Heat olive oil in a big soup pot. Saute onions and garlic around 5 minutes, stirring to prevent burning. Pour in the cans of tomatoes, and add the 1/2 cup of water and the milk to the pot. Stir in the spices. Simmer for around 15 minutes, stirring occasionally.
To serve, ladle into bowls. Top with cheese and grounded black pepper.
Eat and be warm!

Tuesday, February 23, 2010

Homemade Kombucha


After recently becoming interested in the process of fermentation in food, I am embarking on a project: making my own kombucha! A type of fermented tea that is often mixed with juice, I have been drinking kombucha for about a year. The fizzy drink is becoming incredibly popular in natural food stores, as it boasts great health benefits, and I usually drink a bottle a week at my local Co-Op. But after speaking with several individuals who make their own kombucha, I have not been able to get the thought out of my mind.

Below I outline the first steps in making kombucha, which takes around 3 weeks. In following posts I will divulge more information

To start the process you must first grow a mushroom-type object call a SKOBY. You will need:

1 large mason jar
cheesecloth and rubber bands
Organic white tea
1/2 cup Sugar (the kombucha will eat the sugar so don’t skimp!)
4 cups Water
1 store-bought bottle of raw kombucha

Directions:
Boil a large mason jar in water for 5 minutes to kill any bacteria that may already exist. As with any canning procedure, everything must be kept very clean. In a large pot brew 4 cups of organic white tea. I used 4 tea bags. Boil the water for the tea no less than 5 minutes to insure cleanliness. Allow the tea to completely return to room temperature.

Pour the tea in the clean mason jar with the cup of sugar. Finally, pour the bottle of raw kombucha tea into the jar, cover the top with cheesecloth and secure it with a rubber band. Place the jar in a room-temperature location where it will not get disturbed for 3 weeks, until a disk-shaped SKOBY is formed.

The photo above shows a jar that I began last week, and you can see the growth forming at the surface already! Stay tuned for more!

Monday, February 15, 2010

Gas Station Rant


After an extremely long car trip from Indiana to New Orleans and back, (talk about cramped legs!), my travel companions and I obviously had to stop numerous times at some of the finest gas stations the South has to offer.

Gas stations are peculiar places. Open 24 hours a day, at first they all seem different. The fancy ones cater to truckers, and contain spiffy knick-knacks such as pleather jackets and dragon dashboard sculptures. Some hold endless racks of hot-dog cylinders, slowly cooking the questionable-looking franks for undisclosed periods of time.

But after almost 26 hours of driving in one weekend, these gas stations began to blur together. The products and snacks found in the deserted aisles are identical. Hostess products dominate the endcaps; prime real-estate to catch the eyes of hungry drivers. Many products, (usually sweet confections and plastic wrapped baked goods), are labeled as allusions to the comfort of home and childhood, perhaps as a way to bring back the long lost memories of simpler times. But there is something strange and incredibly disingenuous to these products. My own grandma never packaged her cookies like Grandma's Vanilla Sandwich Creme Cookies does, and who is Little Debbie and why does she want to sell me her Honey Buns?

Food in gas stations is presented to Americans as more of a commodity than actual food, and it is just about as far removed from nature as possible. I recognize that when we visit gas stations we are often in a hurry, and not quite sure where we are, but is that excuse to completely sever our ties with our food's roots? If anything, gas stations have the possibility to feature local products from the region, in order to make each establishment something of a cultural site rather than a junk-food hell.

The endless rows of chemical-laden products do nothing to help our eating habits, and they are counterproductive to the healthy-eating practices, (for both our bodies and the Earth), that so many are trying to spread. For this reason, while the crazy food products are entertaining in their outlandishness, I suggest that you stock up on your own snacks before your next car trip.

Sunday, January 17, 2010

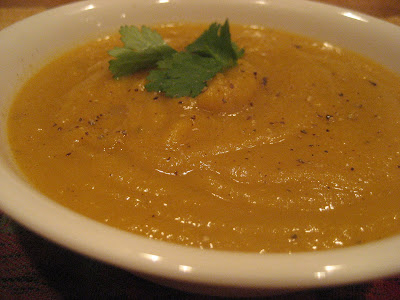
Sweet Potato, Squash and Apple Soup


A lazy Sunday afternoon calls for a lazy stroll to the nearby market, and a lazy recipe for soup. The following recipe is overflowing with the flavors of Autumn: butternut squash, apples, sweet potatoes and onion. Before trying the soup, I was convinced that it would taste peculiar, but because the majority of ingredients have a sweetness to them, it works wonderfully. The soup only has a hint of apple in it. Not to brag or anything, but my roommate Abbe said it was the best thing I've ever made. Success!!

Have a happy Sunday.

Sweet Potato, Squash and Apple Soup
From the cookbook, How It All Vegan

1 medium onion, chopped

1 tbsp olive oil

2 cups vegetable stock

2 cups butternut squash, peeled and diced

2-3 medium gala apples

1/2 tsp nutmeg

1/2 tsp salt

1/2 tsp pepper

1/4 tsp cayenne pepper

In a large soup pot, heat olive oil. Add onions and cook until translucent. Add stock, squash, apple, potatoes, and spices. Bring to a boil. Cover and reduce to a simmer. 2 ladles at a time, blend until smooth in a food processor or blender. Return to soup pot and stir before serving.

Sunday, January 3, 2010

Perfect Pancakes


For some crazy, insane reason that I cannot identify, I am almost a stranger to the delicious breakfast food known as pancakes. Perhaps I have never had the time nor patience to make the Sunday-morning staple, and shied away from the sickly sweet prepared dry batter that I see lining the shelves of the grocery store. (Rarely is the taste anything but horrible when a product claims to "Just Add Water").

But after receiving an outstanding cookbook for Christmas, Vegan Brunch by Isa Chandra Moskowitz, I vowed to tackle pancake making. Spending the last few days in Vermont proved to be the perfect opportunity to pull out the griddle when the weather dropped to a whooping 5 degrees.

I was pleasantly surprised with the whole process, as the recipe provided by Vegan Brunch asked for only a few ingredients, little labor more than whisking flour, and a slightly sweet, deliciously fluffy pancake!

Top these with a big drench of maple syrup. Hey, when in Vermont you have to take advantage of the staple product!

Classic Pancakes
By Vegan Brunch

1 1/4 cup flour

2 teaspoons baking powder

1/2 teaspoon salt

1 teaspoon ground cinnamon

2 tablespoons canola oil

1/3 cup water

1 to 1 1/4 cups plain rice or soy milk

2 tablespoons pure maple syrup

1 teaspoon pure vanilla extract

Cooking spray

Directions
Preheat a skillet over medium heat for at least 2 minutes.
Sift all dry ingredients together. Make a well in the middle and pour in all of the wet ingredients. Mix until just combined. Lumps are okay.
Spray the pan with a light coat of cooking spray. Pour pancakes one at a time and cook until bubbles form and the top looks somewhat dry (about 3 minutes). Flip over and cook for another minute. Stack on plate and serve.